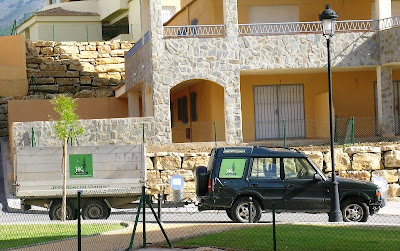
Arriving at a new job is always exciting, to be able to convert a scrubby looking garden into an oasis in only a few days gives all the team a real kick - we know we have some hard work ahead but its worth it.
As well as building and designing gardens we are also official installers of Royal Grass an artificial turf that's head and shoulders above the rest. Its manufactured by a Dutch company called Tencate who are the world leaders in artificial sports turf, and Royal Grass is the home and garden product from these world leaders - we highly recommended it to anyone that has a holiday home or lives in sunnier climes..
This new job was at the Don Carlos Urbanization in Benalmadena, Malaga for a holiday home and the client wanted a complete makeover of the garden including 90m2 of Royal Grass exclusive. The garden was a little difficult to access and we didn't fancy wheel barrowing over 200m with all the materials so we ordered a 27 m crane to take the back ache out the job.
Stage 1. Clearing the garden of grass, shrubs and weeds then filling in with 10cm per m2 of quartz sand, this doesn't sound so much, but for this 90 m2 lawn we needed 16.5 tonnes. This is stomped with our stomping machine to provide a level and firm base and excellent drainage for the royal grass.
Stage 2. Anti weed matting is laid over the sand and trimmed to fit.
Stage 3. Royal Grass is cut to size and laid on top of the anti weed matting.

Glueing two pieces of Royal Grass together
Stage 4. The edges between the Royal Grass sections are joined practically seamlessly using Royal Grass glue paper and Royal Grass glue, then trimmed.
Stage 5. We use 12.5 kg per square meter of river washed sand that has no sharp edges and 5 kg per square meter of black ceramic sand which is layed on top of the royal grass, this keeps the royal grass firmly in place and also gives a very realistic feel and look to the lawn.
Stage 6. Final trimming round plant borders and edges and we can start on the planting out of the flower beds - perhaps time for a cold beer on the new lawn first.
We planted the Arecastrum Plumoso palm trees and the orange tree before laying the Royal Grass and the flower boarders were the next stage.
 Getting the Hibiscus borders in which should come on quickly
We will post some photos of the finished garden next week - watch this space for some new and exciting Garden capers with the JHK special garden team!!! or visit our web site


2 comments:
This was really a spectacula makeover. The garden ended up in another residential called 'Don Juan' and even moved to a different city (Fuengirola). Indeed gardening on a higher level :)
Kenneth,
You forgot the need for cold beers in the other stages of laying Royal Grass!
Post a Comment